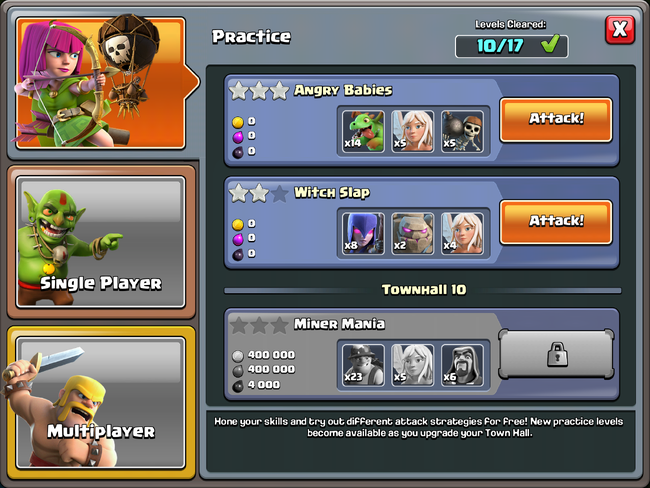
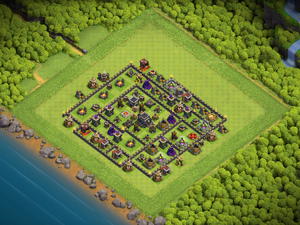
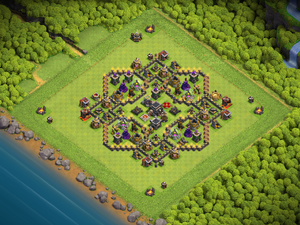
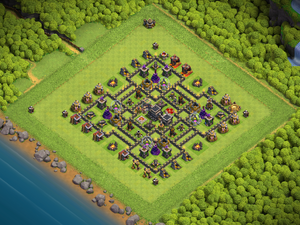
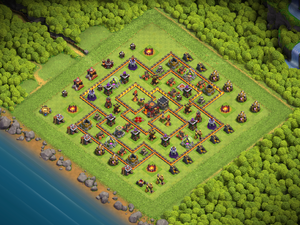
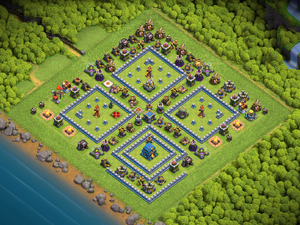
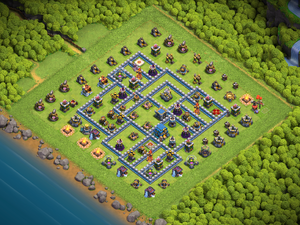
Modo práctica

Resumen
- El modo de práctica permite al jugador probar varias estrategias de ataque. Cada estrategia tiene un nivel preestablecido. Se añadió en la actualización 11.651.7 (también conocida como actualización de verano de 2019), que se lanzó en junio de 2019.
- No se ganan ni se pierden trofeos, y tampoco hay límite de tiempo. Cada nivel contiene una cantidad determinada de botín que se puede ganar una vez, igual que en la Campaña para un jugador.
- El jugador no necesita entrenar ninguna tropa para cada nivel; en su lugar se le dará un ejército para cada nivel. Los héroes proporcionados para el nivel de práctica no afectan en modo alguno a tus propios héroes.
- Cada base es una posible base de jugador en ese nivel de Ayuntamiento (o parte de tal base), a diferencia de la Campaña de un jugador, donde los niveles pueden contener edificios y trampas con mayor cantidad o nivel que una base de jugador del mismo nivel de Ayuntamiento. Sin embargo, dado que algunos de estos niveles son bases de jugadores incompletas, y debido a la falta de límite de tiempo, algunas de estas estrategias requerirán adaptación por parte del jugador para que funcionen con éxito en la batalla real (especialmente aquellas estrategias que impliquen el Paseo de la Reina y que hagan que el ataque dure más de 3 minutos).
- En el primer intento de cada nivel del Modo Práctica, el jugador recibirá un tutorial que es una guía paso a paso para realizar el ataque; se le indicará cuándo y dónde desplegar cada unidad, o cuándo realizar una determinada acción, como activar una habilidad de héroe. Si el jugador lo desea, puede saltarse este tutorial y volver a activarlo.
- Los jugadores pueden jugar niveles de Práctica relevantes para los Ayuntamientos hasta su nivel de Ayuntamiento. Por ejemplo, los jugadores con Town Hall 7 podrán jugar todos los niveles de Práctica para Town Hall 7 e inferiores. Sin embargo, antes de la actualización TH14, podías jugar un nivel de práctica que estuviera 1 nivel de Ayuntamiento por encima de ti.
- Actualmente hay 19 niveles del Modo Práctica.
Ayuntamiento 4
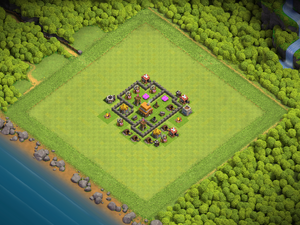
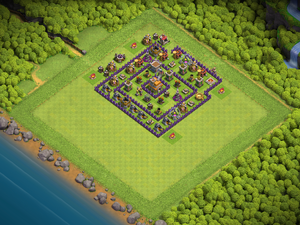
Giant Smash
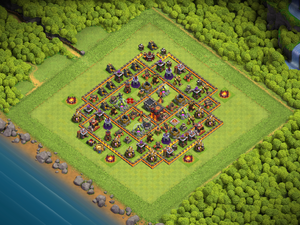
Este nivel se centra en los fundamentos del ataque con Gigantes.
El tutorial del nivel se desarrolla de la siguiente manera:
- Despliega un Gigante para proteger a los Rompemuros de la parte inferior izquierda. Utiliza rápidamente los rompemuros para destruir los muros antes de que muera el gigante.
- Una vez que los rompemuros destruyan los muros, envía a los 12 gigantes para que eliminen las defensas restantes, y luego usa trasgos para limpiar cuando el mortero sea destruido. (Nota: en realidad no tienes que esperar a que el Mortero sea destruido para desplegar Duendes, pero no es recomendable ya que los Duendes serán vulnerables al Mortero).
Botin disponible: 100,000 ![]() y 100,000
y 100,000 ![]() .
.
Ejercito viable:
Ayuntamiento 5
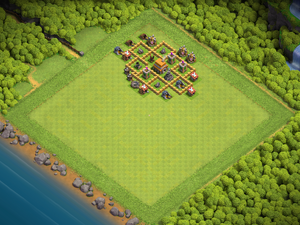
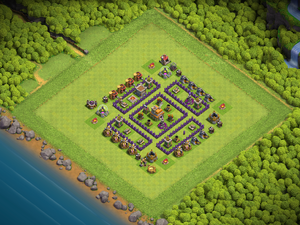
Balloon Parade
Este nivel se centra en atacar con Globos en masa.
El tutorial del nivel procede de la siguiente manera:
- Despliega 12 globos orientados hacia el cañón de la parte superior izquierda para atacar la defensa antiaérea (ya que los Cohetes de defensa es la primera prioridad porque es la que más daño hace a tus globos).
- Despliega 10 Globos cerca de las Torres Arqueras de arriba a la derecha (cinco por cada Torre de Arqueras) para minimizar el daño por salpicadura.
- Utiliza los globos restantes para destruir la torre de arquera restante.
Botín disponible: 125,000 ![]() y 125,000
y 125,000 ![]() .
.
Ejercito viable:
Ayuntamiento 6
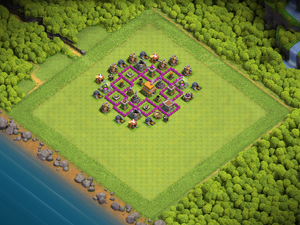
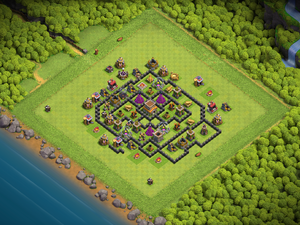
Meat Shield
Este nivel toma el concepto de Gigantes actuando como protectores , que toman el daño de las defensas y permiten a otras unidades más vulnerables como los Magos hacer daño.
El tutorial del nivel es el siguiente:
- Despliega un Gigante para proteger a los Rompemuros de la parte inferior izquierda, mientras los despliegas rápidamente para destruir los Muros antes de que el Gigante muera.
- Comienza el ataque principal desplegando primero Gigantes para proteger a tus Magos y distraer el fuego.
- Usa un hechizo de curación para proteger a los gigantes de la torre de magos y despliega 5 magos a cada lado para despejarla.
- Después de que hayan caído los disparos de mortero, usa los rompedores de muros para destruir el siguiente compartimento de muros para que tus magos y gigantes puedan alcanzar el ayuntamiento y más defensas.
- Despliega los magos restantes en el centro para entrar y ayudar a tus gigantes, luego usa otro hechizo de curación cuando tus gigantes sean el objetivo de otra torre de magos.
Botín disponible: 150,000 ![]() y 150,000
y 150,000 ![]() .
.
Ejercito viable:
Ayuntamiento 7
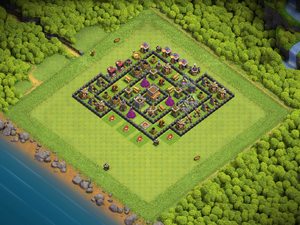
Hot Stuff
This level introduces the strategy of attacking with massed Dragons.
The level's tutorial proceeds as follows:
- Este quiere que ataques detrás del Controlador aereo. Usa 5 Hechizo de rayos para destruir los Cpohetes de defensa a la derecha del Ayuntamiento. (Nota: También puedes destruir el Controlador aereo junto a los Cohetes de defensa objetivo usando los Hechizos de rayos en la Torre de arqueras adyacente).
- Una vez derribada, despliega el Rey Bárbaro junto al Rey defensor para proteger a los Dragones de las Torres Arqueras. Despliega un Dragón en el Campamento de abajo y a la derecha para despejar los laterales.
- Despliega otro Dragón en el tercer Campamento , esto canalizará tus Dragones restantes hacia el centro.
- Por último, despliega los dragones restantes en el Colector de Elixir cerca del cañón y el almacén de elixir.
- Puedes usar el Hechizo de rayo restante (si aún no lo has soltado) para hacer el daño adicional que desees.
Available loot: 200,000 ![]() and 200,000
and 200,000 ![]() .
.
Available Army:
Hog Rush
This level introduces the strategy of attacking with Hog Riders.
The level's tutorial proceeds as follows:
- Deploy the Barbarian King at the top to defeat the enemy King so he will not ruin the attack (the defending King will attack Hog Riders while they do not fight back). Deploy Wizards to help your King to defeat it quickly.
- Once the enemy King is knocked out, deploy all Hog Riders at the bottom to clear up the defenses.
- Use a Healing Spell to protect Hog Riders as they become heavily damaged.
- Use the remaining Heal Spells to assist Hog Riders further as they continue destroying defenses and eventually the remaining buildings.
Available loot: 200,000 ![]() and 200,000
and 200,000 ![]() .
.
Available Army:
Air Raid
This level showcases the Balloonion strategy - attacking with Balloons and Minions.
The level's tutorial proceeds as follows:
- Deploy Balloons at the bottom to destroy defenses (in two groups, with 15 in each group). Use Rage Spells for each group to make them faster and deal more damage.
- Deploy the Barbarian King to distract the remaining Wizard Tower on the right side.
- Use Minions to take it out and help with clean up.
Available loot: 200,000 ![]() and 200,000
and 200,000 ![]() .
.
Available Army:
Town Hall 8
Heavy Hitters
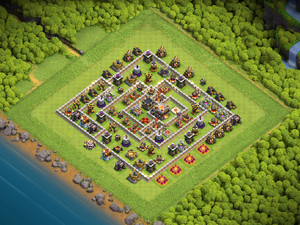
This level showcases the GoWiPe strategy - attacking with Golems, Wizards and P.E.K.K.As.
The level's tutorial proceeds as follows:
- Use an Earthquake Spell on the marked Air Defense to weaken the buildings and walls beside it.
- Deploy a P.E.K.K.A on each side to clear the corners, and 2 Wizards behind each P.E.K.K.A for Support.
- Deploy your Golem on the top (between the P.E.K.K.As) to shield your troops, then use Wall Breakers to destroy the wall while your Golem is soaking up damage.
- Now that the sides are cleared, deploy the Barbarian King and the remaining P.E.K.K.As. They will head straight into the middle to battle.
- Deploy more Wizards behind to help your King and P.E.K.K.As.
- Use a Healing Spell and Rage Spell on the entrance for support.
- Use the remaining troops and the second Healing Spell for support. In particular, the Healing Spell should be used to keep your Wizards alive while they clean up the base.
Available loot: 250,000 ![]() , 250,000
, 250,000 ![]() and 1,500
and 1,500 ![]() .
.
Available Army:
Whirl Power
This level showcases the GoWiVa strategy - attacking with Golems, Wizards and Valkyries. It also introduces the player to defensive Clan Castle troops (in this case, 5 level 5 Balloons) and how to defeat them.
The level's tutorial proceeds as follows:
- Use Earthquake Spells at the bottom to open up the Walls on the bottom-left side. Deploy a Hog Rider to trigger Clan Castle troops out.
- Deploy an Archer next to the Builder's Hut far away from the rest of the base to draw the enemy Balloons over.
- Use the Poison Spell to slow the Balloons down, and use a Golem to distract the Balloons while deploying Wizards to clear them.
- Deploy the Barbarian King to go in the base, then deploy Valkyries (14 going inside the base, and 1 in the bottom corner to funnel them in) behind the Barbarian King.
- Use a Healing Spell on the entrance so that your troops can survive and keep on going.
Available loot: 250,000 ![]() , 250,000
, 250,000 ![]() and 1,500
and 1,500 ![]() .
.
Available Army:
Town Hall 9
Lava & Loons
This level introduces the player to the Lavaloon strategy - attacking with Lava Hounds and Balloons.
The level's tutorial proceeds as follows:
- The first objective is to defeat the enemy Archer Queen, which is deadly against Balloons (like with Hog Riders, the defending Archer Queen will attack the Balloons without them attacking back). Deploy the Barbarian King to take her out when she jumps out of the Walls. Use the King's ability to quickly knock out the Queen.
- Deploy your Archer Queen to destroy some air-targeting defenses (an Air Defense, Archer Tower and Wizard Tower). She will do so and take out all things instructed by the game.
- Once the Archer Tower is destroyed, drop 2 Haste Spells on the bottom-left side (one on the Barracks and one on the Dark Barracks). Deploy your Lava Hounds (one near each Haste Spell) to shield your Balloons and to trigger Air Bombs. Once the Lava Hounds are deployed, follow up with your Balloons in two groups (13 per group).
- Use the Freeze Spell to disable the Air Sweeper (and a nearby Air Defense), and use a Rage Spell so that most troops (especially the Balloons) will benefit from it.
- Use the second Rage Spell over the Town Hall compartment to help Balloons clear up the remaining defenses, and use another Haste Spell to speed up your Balloons that are traveling outside the Rage.
- Use the remaining troops and Haste Spell for cleanup.
Available loot: 300,000 ![]() , 300,000
, 300,000 ![]() and 3,000
and 3,000 ![]() .
.
Available Army:
Angry Babies
This level introduces the player to using Baby Dragons and Queen Walks/Charges - the latter being a useful offensive tool consisting of the Archer Queen and Healers.
The level's tutorial proceeds as follows:
- Start by using a Queen Charge to clear a path in the village. Start by deploying the Archer Queen, then your Healers. The main goal of the Queen Charge is to destroy an Air Defense, and the enemy King and Queen (however the game marks the Bomb Tower as the objective).
- Once the Queen destroys the bottom-right Archer Tower, use Wall Breakers to open up the bottom-right compartment, allowing the Queen to reach the Bomb Tower. Use the Poison Spell to slow down enemy Heroes after the Bomb Tower is destroyed, and a Rage Spell for both Archer Queen and Healers. The Queen will take them all out.
- After the Queen defeats the Heroes (and destroys more buildings), drop your Barbarian King on the Army Camp at the right-hand corner to clear it. Use a Jump Spell once the King destroys the Spell Factory so that the King can come in and help your Queen. The two will work together to reach and destroy the top-right Air Defense.
- Once that Air Defense is destroyed, deploy all of your Baby Dragons at the top. Use the remaining Spells and the Queen's ability to finish off the attack.
Available loot: 300,000 ![]() , 300,000
, 300,000 ![]() and 3,000
and 3,000 ![]() .
.
Available Army:
Witch Slap
This level showcases the Witch Slap strategy - a strategy primarily consisting of Witches to overwhelm enemies.
The level's tutorial proceeds as follows:
- Deploy a Wizard to clear the Army Camp at the top-right side. Deploy the Archer Queen, followed by your Healers. Because the Army Camp is destroyed, the Queen will walk downwards around the bottom-right side of the base.
- Eventually, once the Queen destroys the bottom-right Air Defense, use the Earthquake Spells to open up the base at the bottom-left, to make way for your Golems and Witches.
- Once the Queen reaches the opening, deploy the Golems at the opening to soak up damage. Deploy 2 Witches on the bottom-left to funnel your other witches in, followed by the remaining Witches and the Barbarian King behind the Golems.
- Use a Rage Spell at the entrance, then a Poison Spell to slow down the enemy Queen as your troops attack her. Once the enemy Queen is defeated and the TH compartment is cleared, use the Jump Spell to open up more compartments.
- Use the remaining Wizard and the Barbarian King's ability to finish off the attack.
Available loot: 300,000 ![]() , 300,000
, 300,000 ![]() and 3,000
and 3,000 ![]() .
.
Available Army:
Town Hall 10
Miner Mania
This level introduces the player to attacking with Miners.
The level's tutorial proceeds as follows:
- Deploy the Archer Queen at the top side of the base, as well as the Healers. Yet again, we are creating another Queen Walk to funnel the Miners, this time walking across the top-left side of the base.
- Deploy a single Wall Breaker on the Walls at the top-left side to check for Bombs. It turns out there is, so the Wall Breaker dies to the Bomb's explosion. However, it allows for you to follow up with your remaining Wall Breakers to actually destroy the wall.
- To ensure the Queen actually enters the base, use Wizards on the buildings on the left corner to funnel her in.
- Drop a Poison Spell on the enemy Queen to slow her down as your Queen approaches. At the same time, use a Rage Spell to quickly destroy the Inferno Tower as it attacks your Healers.
- The Queen will proceed to defeat the enemy Queen, destroy some more defenses and then destroy the Town Hall. Deploy your Miners on the left corner (to attack buildings outside), and then some Wizards on the bottom corner to ensure the Miners stay inside the base. Repeat with more Wizards on the right-hand corner.
- Deploy your Barbarian King on the bottom-right side to distract defenses.
- Use your Healing Spells and hero abilities to support the Miners and help them finish off the base.
Available loot: 400,000 ![]() , 400,000
, 400,000 ![]() and 4,000
and 4,000 ![]() .
.
Available Army:
Bowling with Bats
This level introduces the player to P.E.K.K.A BoBat, a powerful attack strategy consisting of P.E.K.K.As, Bowlers and Bats from Bat Spells.
The level's tutorial proceeds as follows:
- Deploy the Archer Queen and Healers at the bottom. The main point of this Queen Walk is to destroy 2 Wizard Towers to help your Bats later on.
- As the Queen passes the bottom corner, use a Rage Spell to boost your Queen and Wall Breakers (the latter, while raged, will do more damage against Walls and break the walls opening the bottom compartment), and enable the Queen to reach and destroy the Wizard Tower.
- Now, we are going to use the other troops to clear out 2 more Wizard Towers and the multi Inferno Tower. Start by deploying the Wall Wrecker at the top, followed by your Barbarian King, then the P.E.K.K.As, then your Bowlers. Use a Rage Spell on the top side so that the troops there will benefit from it.
- Next, deploy your Bat Spells close to where your Queen started as they will clean up everything in the base.
- Use the provided Freeze Spells to help protect the Bats and your other troops as they clean out the base.
Available loot: 400,000 ![]() , 400,000
, 400,000 ![]() and 4,000
and 4,000 ![]() .
.
Available Army:
Town Hall 11
Lava & More Loons
This level expands on the Lavaloon attack strategy, specifically using a ground attack (in this case sui heroes) as a first phase.
The level's tutorial proceeds as follows:
- The goal for the initial ground phase is to deal with the Eagle Artillery, two Air Defenses, and the enemy Queen at the top side of the base (all of the aforementioned defenses are dangerous against your Lavaloon attack). Start by opening the top compartment with a Jump Spell. Deploy a Ice Golem to tank, and follow up with your Barbarian King and Archer Queen.
- The King will destroy two Cannons and a Wizard Tower while tanking for the Queen. Meanwhile, the Queen will have the chance to destroy the targets informed by the game. Use the Poison Spell to slow down the enemy Queen while she is engaging your heroes. Allow the Heroes to destroy the defenses and defeat the enemy Queen before they are knocked out.
- Once the Heroes are down, drop three Haste Spells, across the right-hand side of the base, two on two different Archer Towers and one on a Cannon. Deploy 2 Lava Hounds at the top two Haste Spells to protect your Balloons, and then deploy Balloons behind them (8 per haste spell, 16 total), and then your Grand Warden in air mode.
- Deploy the Stone Slammer on the last Haste Spell to tank damage and assist in clearing defenses. Follow up with 5 Balloons behind.
- Deploy the last Lava Hound by the bottom-left Archer Tower and your remaining Balloons (4 near the aforementioned Archer Tower, and another 4 next to a nearby Cannon).
- Use Rage Spells in the middle to help your Balloons take down tough targets (the group on the right will be headed in the center, while the group on the bottom-left destroys the nearby Air Defense), and activate the Grand Warden's ability to protect your troops from damage.
- Use the remaining Haste Spell and Minions for cleanup.
Available loot: 500,000 ![]() , 500,000
, 500,000 ![]() and 5,000
and 5,000 ![]() .
.
Available Army:
Electro Surgery
This level introduces Electro Dragons and their uses surgically (as in deploying them in precise locations).
The level's tutorial proceeds as follows:
- The game points out that this base has a weakness against Electro Dragons. Deploy 1 Electro Dragon next to the Gold Storage in the bottom corner to clear an Air Defense at the bottom using its Chain Lightning.
- Once the Air Defense is destroyed, drop the Archer Queen at the Dark Barracks to funnel the Electro Dragon.
- Once the Wizard Tower is destroyed, deploy the Battle Blimp (which contains an Electro Dragon and a Balloon) at the bottom-left side, targeting the Eagle Artillery and the enemy Queen.
- Drop a Rage Spell and the Clone Spells in the core in preparation for your Blimp's reinforcements so that the reinforcements (and the resulting cloned Balloons) can clear the core quickly. Break the Blimp once it has reached the spells.
- Once the enemy Queen is knocked out, deploy an Electro Dragon to clear the left-hand corner.
- Deploy your remaining Electro Dragons in a line, followed by the Grand Warden in air mode for support, then your Balloons. Deploy also the Barbarian King on the top-right to help funnel the Electro Dragons.
- Use a Rage Spell to help your Electro Dragons and Balloons push through the base, and use the Warden's ability to prevent damage from traps.
- Use the remaining spells and the Barbarian King's ability to clean up the base.
Available loot: 500,000 ![]() , 500,000
, 500,000 ![]() and 5,000
and 5,000 ![]() .
.
Available Army:
Town Hall 12
Bowling with Witches
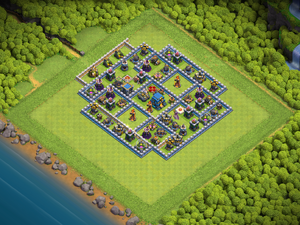
This level showcases the BoWitch strategy, where Bowlers are used again, this time in conjunction with Witches.
The level tutorial proceeds as follows:
- Deploy a Balloon to check for any Seeking Air Mines that will cause damage to your Healers. ( There is one actually) After the Balloon goes down, Drop your Healers first, then the Archer Queen.
- As the Queen destroyed the Multi-Mortar ,Use a Rage Spell to boost the Healers. Therefore the Queen won’t need to activate her ability.
- Once the Queen goes down the base, Split your Giants into 2 Groups. (3 in the Middle and 2 at the bottom) as they will tank your army. Follow up with the Wall Wrecker in the Main Army, then your Grand Warden in the Main Army too, and then Barbarian King at the bottom to complete the funnel. Deploy all of them behind the Giants. Just to say the Queen will join the Main Army too.
- Deploy your Witches in the Middle to provide protection to your main army, and then deploy your Bowlers, ( 10 doing the attack in the Main Army and the other 5 at the bottom to help your Barbarian King do the funnel quicker.) Then use some Wall Breakers at the bottom to open up the path for your King and Bowlers so they can continue the funnel.
- Use a Freeze Spell to disable the Inferno Tower before it takes out your Wall Wrecker. (Sometimes it will attack the Giants though) Use another Freeze for the Second Inferno, And then use Rage Spells to support both groups. ( The Rage will be on the Inferno Towers in the Middle, and on the Defenses in the bottom) Then use Jump Spell to open more compartments. Then activate the King’s Ability. (No matter what health he has left. But the game still tells you to activate his ability. Maybe to make the funnel quicker.)
- As the Main Group destroyed the Giga Bomb, Use your Warden’s Ability to Protect your Main Army from the Explosion. Use remaining troops and the Queen’s Ability to finish off the base.
Available loot: 600,000 ![]() , 600,000
, 600,000 ![]() and 6,000
and 6,000 ![]() .
.
Available Army:
Flying Circus
This level showcases the Dragbat attack, where Dragons are used in conjunction with Bat Spells.
The level's tutorial proceeds as follows:
- Deploy the Barbarian King and Archer Queen in the middle of the top-right side, next to the Spell Factory. At the same time, use 2 Balloons to attack the top-left Archer Tower near the single Inferno Tower in the top square.
- Use 5 Bat Spells to take out the Eagle Artillery and single Inferno Tower.
- The Barbarian King will head into the middle, while the Archer Queen will walk upwards around the top square of the base. The Bats will also come to destroy the Air Defense in the middle while the two Balloons should proceed to destroy the adjacent Cannon, meeting with the Queen who is going upwards.
- As the Queen approaches the defending Grand Warden, use Ice Golems to protect the Queen and prevent her from being targeted by the Warden. She will then walk inwards to destroy the Air Defense and the enemy Queen.
- Once the Queen destroys the Air Defense, use Balloons to destroy 3 Archer Towers around the perimeter of the base as marked by the game. At the same time, the Queen will need to activate her ability to knock out the enemy Queen and King.
- Deploy the Stone Slammer on the right-hand corner to destroy the multi Inferno Tower and more defenses.
- Deploy your Dragons in a line on the left-hand corner, followed by your remaining Balloons, and then your Grand Warden in air mode.
- Use the Rage Spell to help the Dragons take down the Inferno Tower in the left square, and use the remaining Bat Spells to destroy the Wizard Tower at the bottom-right. Quickly use a Freeze Spell to keep the Bats alive.
- Use the remaining Freeze Spell and Grand Warden's ability to ensure that the Giga Tesla and any other buildings are destroyed.
Available loot: 600,000 ![]() , 600,000
, 600,000 ![]() and 6,000
and 6,000 ![]() .
.
Available Army:
Yeti Smash
This level introduces working with the Yeti.
The level's tutorial proceeds as follows:
- This attack starts with a Warden Walk. Deploy your Grand Warden (in ground mode) at the bottom corner, and then your Healers. The goal of the Warden Walk is to destroy the multi Inferno Tower and to create a funnel.
- Meanwhile, deploy two P.E.K.K.As and three Wizards on the right-hand corner to clear it. They will do so and defeat the enemy Queen in the process.
- Use a Jump Spell on the outer layer of walls on the bottom-right to gain access to the Giga Tesla and the rest of the TH compartment.
- Once the Warden has created a funnel, deploy the Yetis close to the Warden to draw his attention. Follow up by deploying the remaining P.E.K.K.As, the Barbarian King and Archer Queen.
- Use a Rage Spell at the entrance so that most troops benefit, and once the enemy Clan Castle (a Lava Hound and a Baby Dragon is triggered, use a Poison Spell to slow them down as the Queen takes them out.
- Drop the four Earthquake Spells in the compartment containing the Clan Castle to open up the base. As your troops destroy the Giga Tesla, use your Grand Warden's ability to prevent damage from the explosion.
- Deploy the Stone Slammer to clear the Inferno Tower on the right-hand corner, and use another Rage Spell in the core (where your main force is) to quickly clear everything out.
- Use any remaining Wizards, spells and hero abilities to finish the attack.
Available loot: 600,000 ![]() , 600,000
, 600,000 ![]() and 6,000
and 6,000 ![]() .
.
Available Army:
Town Hall 13
Bane of The Ring
This level showcases the hybrid strategy, a powerful war attack where Miners and Hog Riders are used together. The Royal Champion and the Siege Barracks are also showcased.
The level's tutorial proceeds as follows:
- Start by deploying Valkyries to trigger the enemy Clan Castle (it contains three Ice Golems).
- Deploy the Archer Queen and Healers at the right-hand corner to start a Queen Walk and deal with the enemy CC. Use the Baby Dragon to funnel the Queen upwards, so she walks across the top-right side.
- Use the Poison Spell to slow the Ice Golems down, as the Queen takes them out. At the same time, deploy an Electro Dragon at the bottom-left Mortar to funnel and clear more buildings. Deploy a Golem at the bottom corner to tank, deploy your Siege Barracks behind the Golem and then the Barbarian King on the bottom-right Mortar for funneling.
- Use a Rage Spell and Wall Breaker on the bottom-corner Walls to break them, while also supporting troops spawned by the Siege Barracks. Use the other Wall Breakers to break the Walls on the top-right and let the Queen in, using another Rage Spell to boost them and the Queen.
- Now the main attack starts. Deploy your Miners to the core, followed by the Grand Warden, then the Hog Riders, and then the Royal Champion.
- Use a Healing Spell in the middle to support your Miners and Hogs and keep them alive.
- Use the remaining spells and Hero abilites to finish the attack.
Available loot: 700,000 ![]() , 700,000
, 700,000 ![]() and 7,000
and 7,000 ![]() .
.
Available Army:
Available Loot Table
| Level Number | Level Name | Gold | Elixir | Dark Elixir |
|---|---|---|---|---|
| 1 | Giant Smash | 100,000 | 100,000 | 0 |
| 2 | Balloon Parade | 125,000 | 125,000 | 0 |
| 3 | Meat Shield | 150,000 | 150,000 | 0 |
| 4 | Hot Stuff | 200,000 | 200,000 | 0 |
| 5 | Hog Rush | 200,000 | 200,000 | 0 |
| 6 | Air Raid | 200,000 | 200,000 | 0 |
| 7 | Heavy Hitters | 250,000 | 250,000 | 1,500 |
| 8 | Whirl Power | 250,000 | 250,000 | 1,500 |
| 9 | Lava & Loons | 300,000 | 300,000 | 3,000 |
| 10 | Angry Babies | 300,000 | 300,000 | 3,000 |
| 11 | Witch Slap | 300,000 | 300,000 | 3,000 |
| 12 | Miner Mania | 400,000 | 400,000 | 4,000 |
| 13 | Bowling with Bats | 400,000 | 400,000 | 4,000 |
| 14 | Lava & More Loons | 500,000 | 500,000 | 5,000 |
| 15 | Electro Surgery | 500,000 | 500,000 | 5,000 |
| 16 | Bowling with Witches | 600,000 | 600,000 | 6,000 |
| 17 | Flying Circus | 600,000 | 600,000 | 6,000 |
| 18 | Yeti Smash | 600,000 | 600,000 | 6,000 |
| 19 | Bane of the Ring | 700,000 | 700,000 | 7,000 |
| Total | 6,675,000 | 6,675,000 | 55,000 |
Curiosidades
- The name of the Balloon Parade level is a reference to a commercial where a Hog Rider contentedly sings Balloon Parade while the village is being raided by Balloon.
- In Practice, the P.E.K.K.A is referred as 'PEKKA' without dots.
- Some bases in Practice are inspired by popular base layouts that people made.
- If noted in Balloon Parade level, there is no Lightning Spell.
- For some reason, there are NPC Goblins as villagers in Practice despite being in Home Village.
- In the Giant Smash level, five each of Gold Mines and Elixir Collectors are present, despite there only being four of each available at Town Hall 4. Similarly, in the Balloon Parade level, four Barracks are present despite only three being available at Town Hall 5.

